I've been helping scrappy friends get started with digital scrapbooking. Instead of writing the same thing again and again, I thought I'd make this helpful guide. Feel free to share with your friends!

Getting Started With Digital Scrapbooking
A Handy Guide from Maggie Buckley, MagsGraphics
A LITTLE BIT OF HISTORY
I was a paper scrapbooker for 20 YEARS before I switched to digital. I started scrapbooking when I was 15 years old… and those first albums used construction paper albums with the photos attached by (gasp!) Elmer’s Glue. I cut out magazine quotes for titles and used any stickers I could find. This continued until I went to my first Creative Memories party. That CM Rep did such a sales job that I was sure all of my albums were crumbling into dust as she spoke! I came home with $300 worth of scrap supplies, tore apart my old albums, and reconstructed them with acid-free/lignin-free materials!
Fast forward to when I had kids and left teaching to become a Stay-Home Mom. I always loved computers and wanted to learn some simple animation and graphics. I stumbled upon digital scrapbooking and was surprised to see how crafters could so closely simulate a paper layout with digital items. We already had a digital camera, so I was familiar with Shutterfly. I downloaded a Welcome Kit from a (now-defunct) digi-scrap site, and made my very first digital page back in 2005:
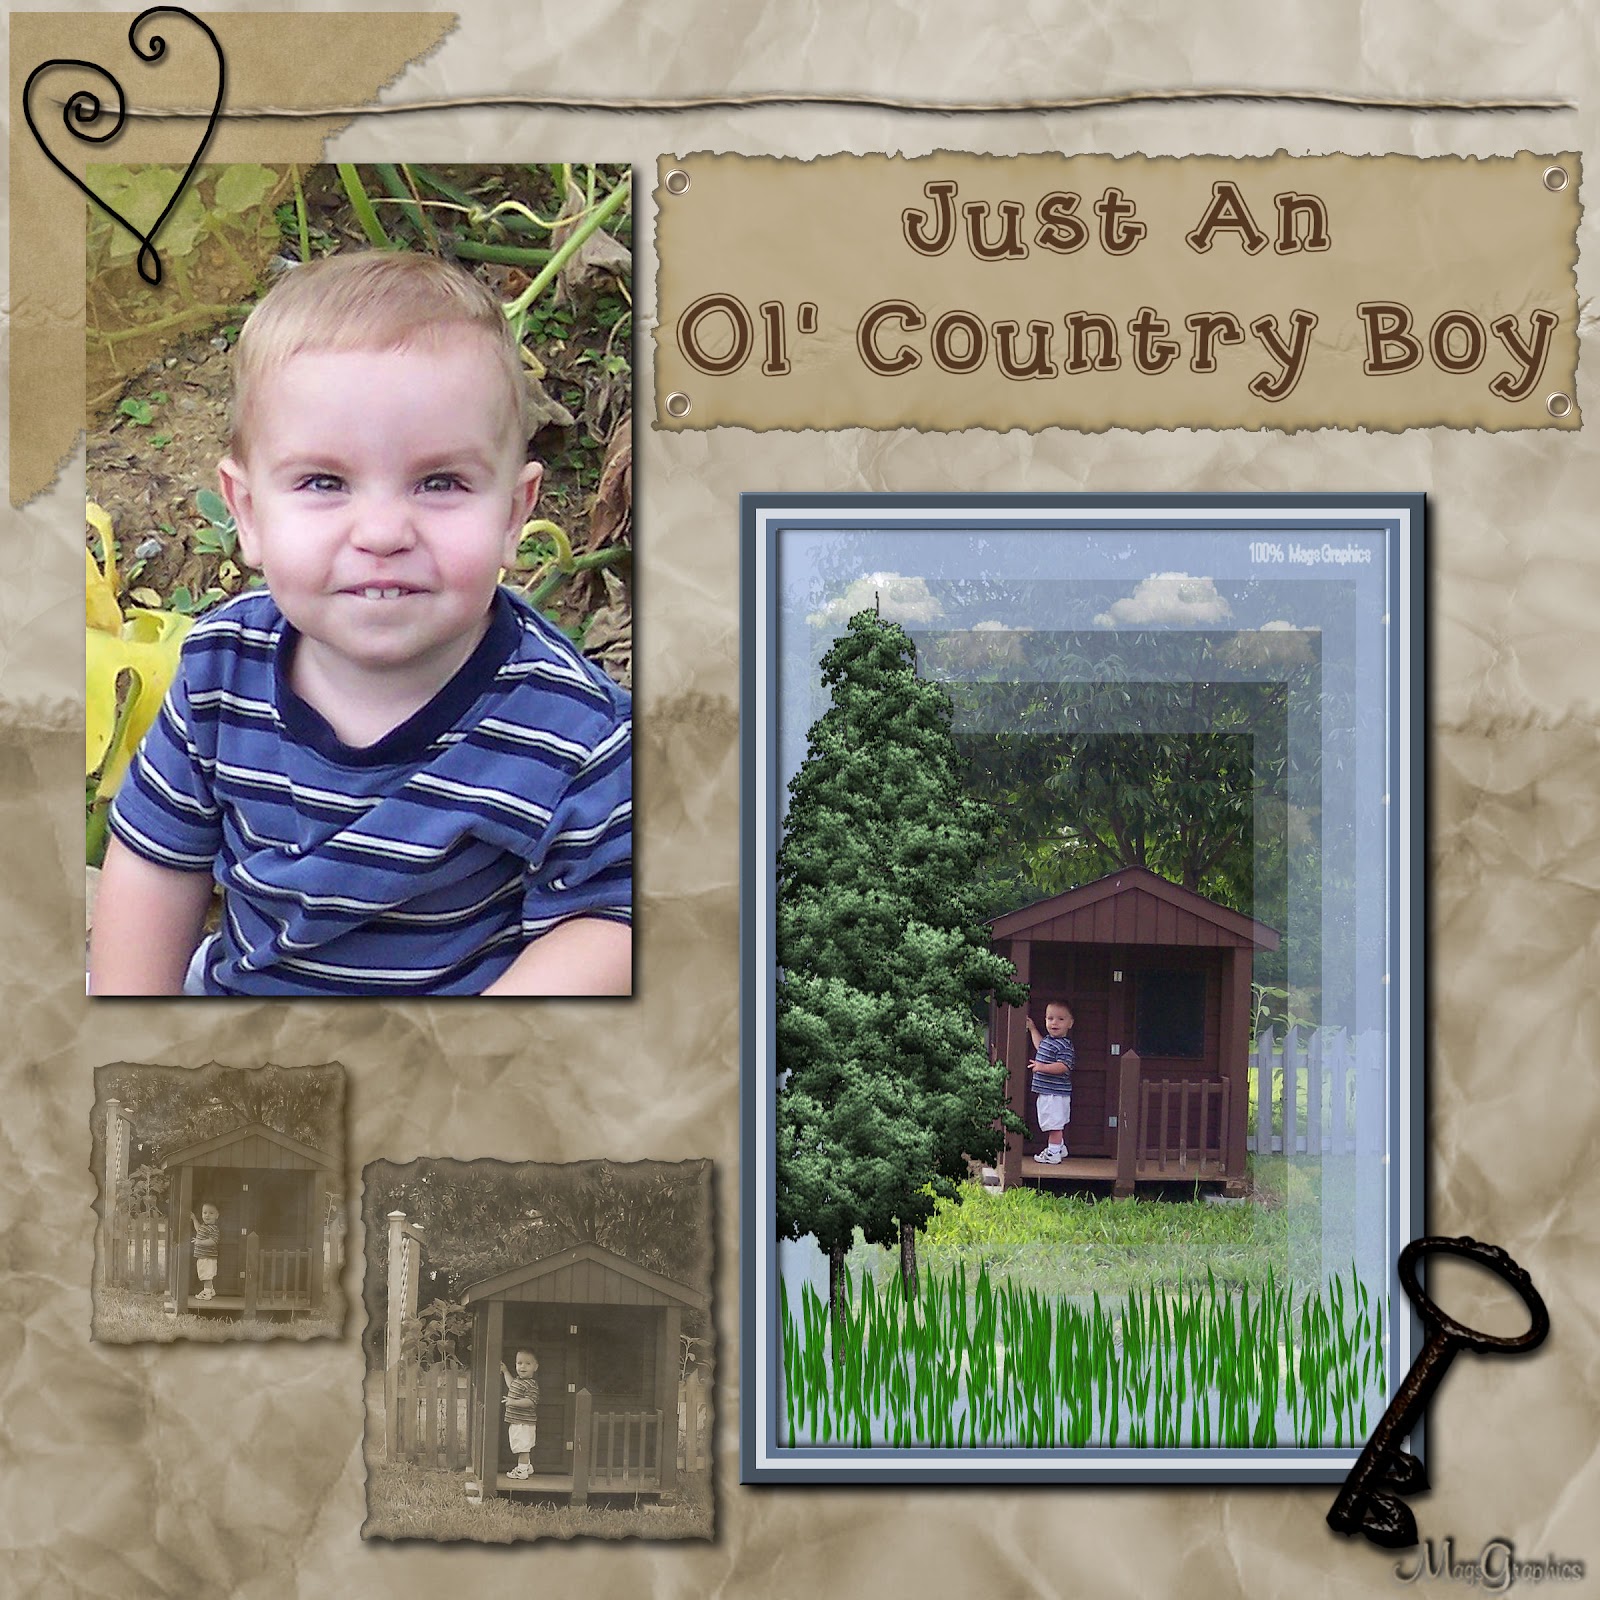
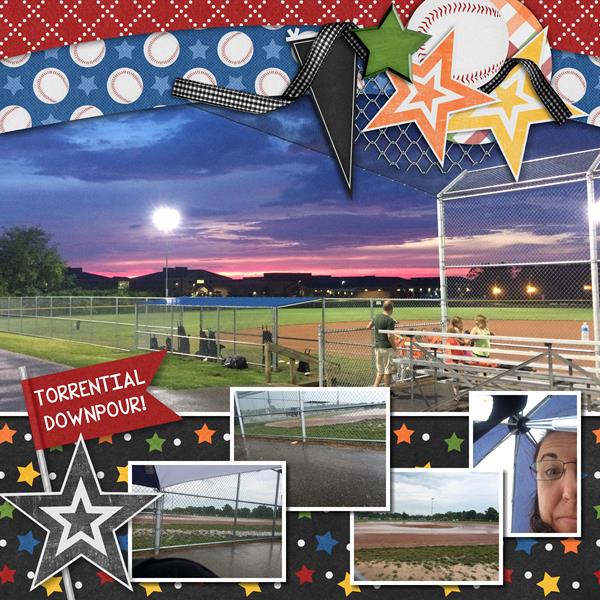
It just took one page to hook me on digital scrapbooking. I love that I can pack up my laptop and external hard drives at take them to a weekend crop instead of lugging around all of those wagons and rolling carts full of supplies. I love that I NEVER run out of adhesive or have to figure out how to make a Capital “S” out of lowercase “e” and “c” stickers because I’ve used all of the S’s. I love that I can buy one kit, and use it again and again on different layouts. I love that I can mix-n-match between kits. I love the generous digital designers who give away so many FREE items. And the more pages I did, the better I got and the easier and faster I created layouts! My record is completing 72 Layouts at a 4-day scrap retreat!


I loved digital so much that I taught myself Paint Shop Pro and then Photoshop so that I could design my own kits for myself and for sale. I’ve been designing since 2008, and if you start at MagsGraphics.com, you can follow the links to all of the different online spots where you can find my kits!
GETTING STARTED
So, YES!!! YOU can do digital!! The method is still the same - you pull out the photos you want to scrap, and then you find a kit that matches them. The difference is that everything you need will be on your computer. Plus, whatever digital kits you buy, you can use again and again on future layouts!
Just like with paper scrapping, you can totally "scraplift" or copy another layout that you've seen. I still have my paper scrapbooking idea books that I pull out when I’m stuck. Plus, there is a HUGE market of "Templates" out there where the layout is laid-out for you and all you need to do is drop in your photos/papers/embellishments to make a layout. Or, if a particular template you like isn't compatible with your software, you can just arrange your layout to match the template (use it as a guide).
When you make a layout, you can choose the dimensions. I always paper scrapped in 12"x12" so I make my digital layouts 12"x12". But some people prefer 8.5"x11" because they can easily print it themselves. Or 8"x8". Because I started as a paper scrapper, I have albums that are paper and then switch to digital for my kids. One kid has THE album where I changed over... the first half of the album has paper layouts and the last half has digital!
STEP 1 - SOFTWARE

To get started you need software. If you already have a good working knowledge of Photoshop, Photoshop Elements, Paint Shop Pro, then you can totally use these. They are the most versatile, but also have the longest learning curve. If you don't already know a program then I highly recommend going with a scrapbooking-specific software like Forever Artisan or MyMemories Suite.
While I do use Photoshop to design my kits for sale, I MUCH prefer using a scrapbooking software for my personal layouts. I've tried various ones over the years, but I'd only recommend two of them: Forever Artisan (easy 1st choice!) and MyMemories Suite.
FOREVER ARTISAN - I started learning this program in June (2020), and I LOVE it! It is the closest program (in terms of cool features and things you can do with the elements and papers you bring into it) to Photoshop which means there is a LOT of features without the steep Photoshop learning curve. There is a huge and active community in the Pixels2Pages Community Group on Facebook and on the Pixels2Pages website - the "Pixies" who run that sister site know everything there is to know about Artisan and can help you with any questions you may have. They have numerous video tutorials on every aspect of the software on their sister site. The price for Artisan is steeper than some software, $129.99, but WORTH IT!!, and there are often sales on the software (check the Deals page), and NEW accounts to Forever get a $20 coupon for joining that can be used on anything - including the software. Start by making an account, then checking out the software. The price is a one-time fee, not a subscription. You can bring in any digital items into Artisan - as long as they are in .jpg or .png formats. It is important to note that any kits bought at Forever require Artisan software. So if you see some designers there that you like (like me!), you need to get Artisan in order to be able to use my products. Also NOTE - Artisan requires WINDOWS. So if you are a MAC user, you'll need to install Parallels or a similar program that allows you to run Windows alongside your OS.
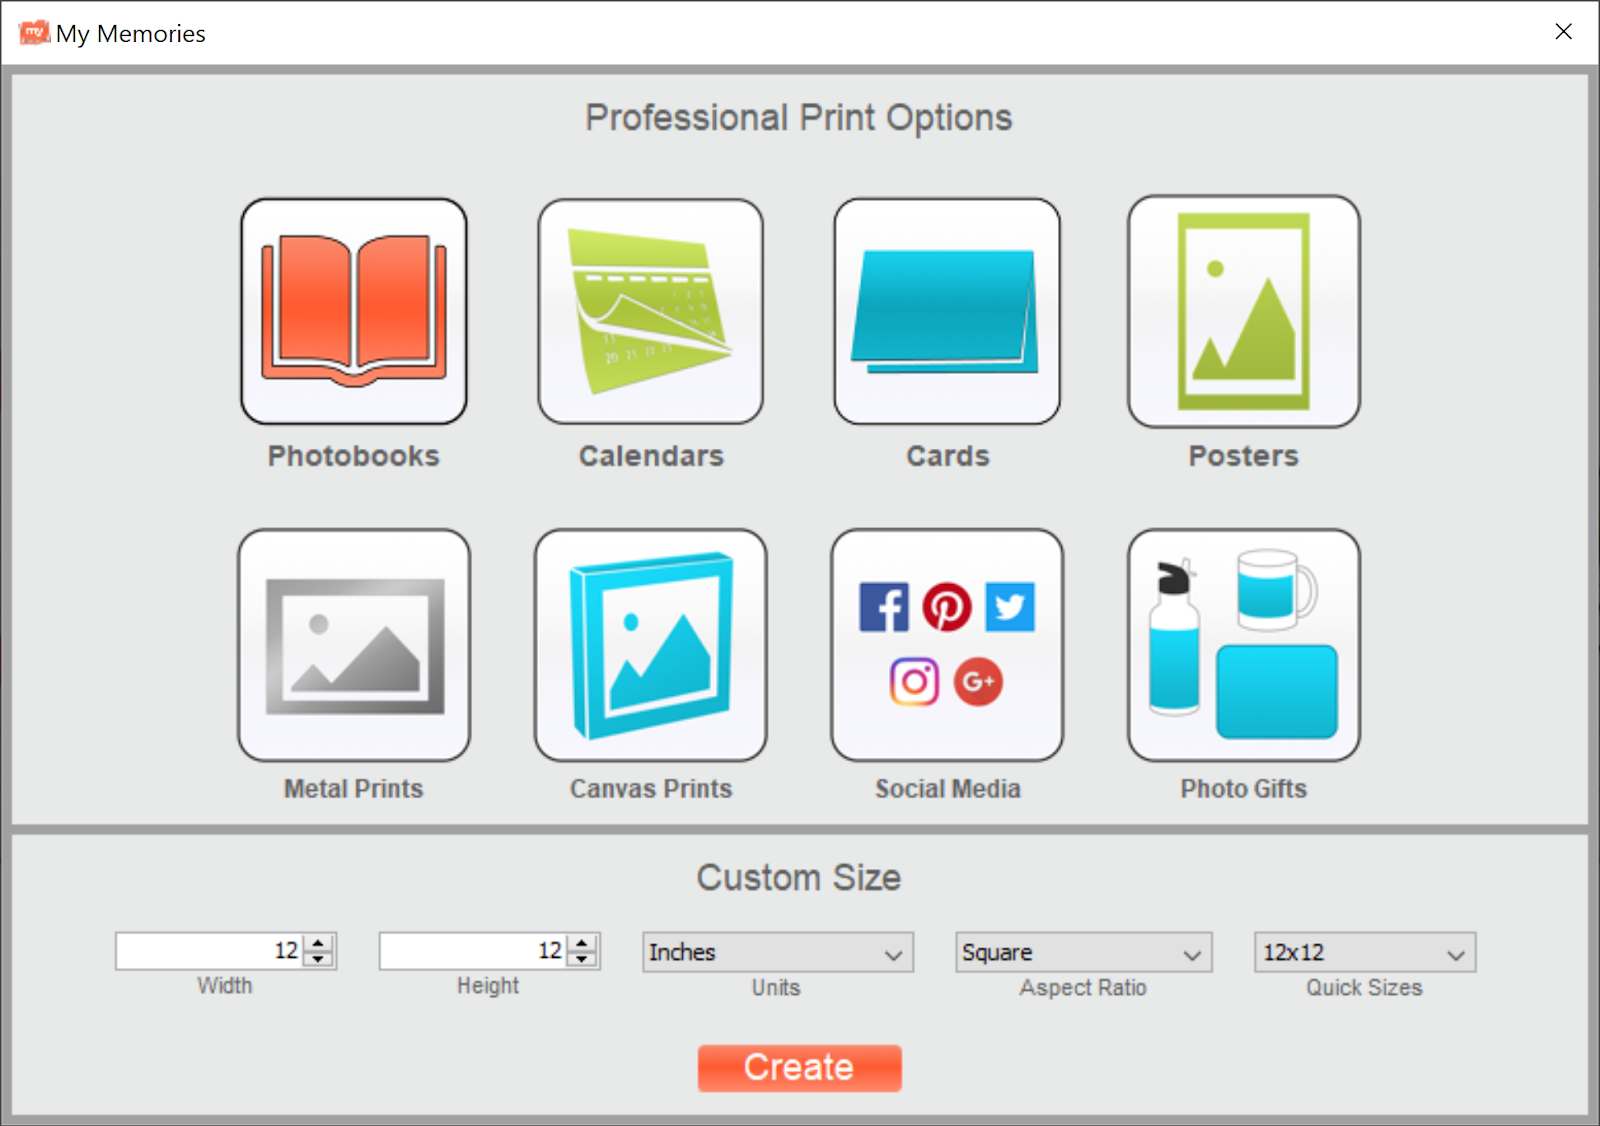
Another perk of working with Forever is the HUGE amount of other stuff on the Forever Website: photo, video, and audio conversion, forever photo storage (literally FOREVER - your photos are stored for your lifetime plus 100+ years and your accounts can be passed on to others in your family when you die). You can order the books you create from their site, and the quality is amazing. Also on their website, they have Design-&-Print (where you design your pages online, no software) and you can also create other items: mugs, calendars, tabletop frames, and more. Plus, for people who prefer to create on their phones, there is the Forever Mobile App! Take some time to wander the website - you'll be amazed at all the place has to offer. ♥
👍Overall, the entire Forever website is packed with options to preserve your memories, and the community of people is helpful and inspiring. I HIGHLY RECOMMEND checking them out. PROS: Robust software with LOTS of features, huge support network of tutorials, instructions, freebies, and fellow scrapbookers who regular share layouts and engage with each other. Kits from other stores CAN be imported and used in Artisan. Intuitive to learn, but I recommend working through the Artisan Getting Started Guide from "The Pixies" - The Pixies are the support team who lead crops, provide tutorials and Blueprints (templates). They are an amazing resource!! There are several Artisan Groups on Facebook - a great place for community and questions.
CONS: Price of software, Art purchased at Forever CANNOT be used in any software other than Artisan. Windows ONLY - Mac users must use Parallels or some other software to run Windows.
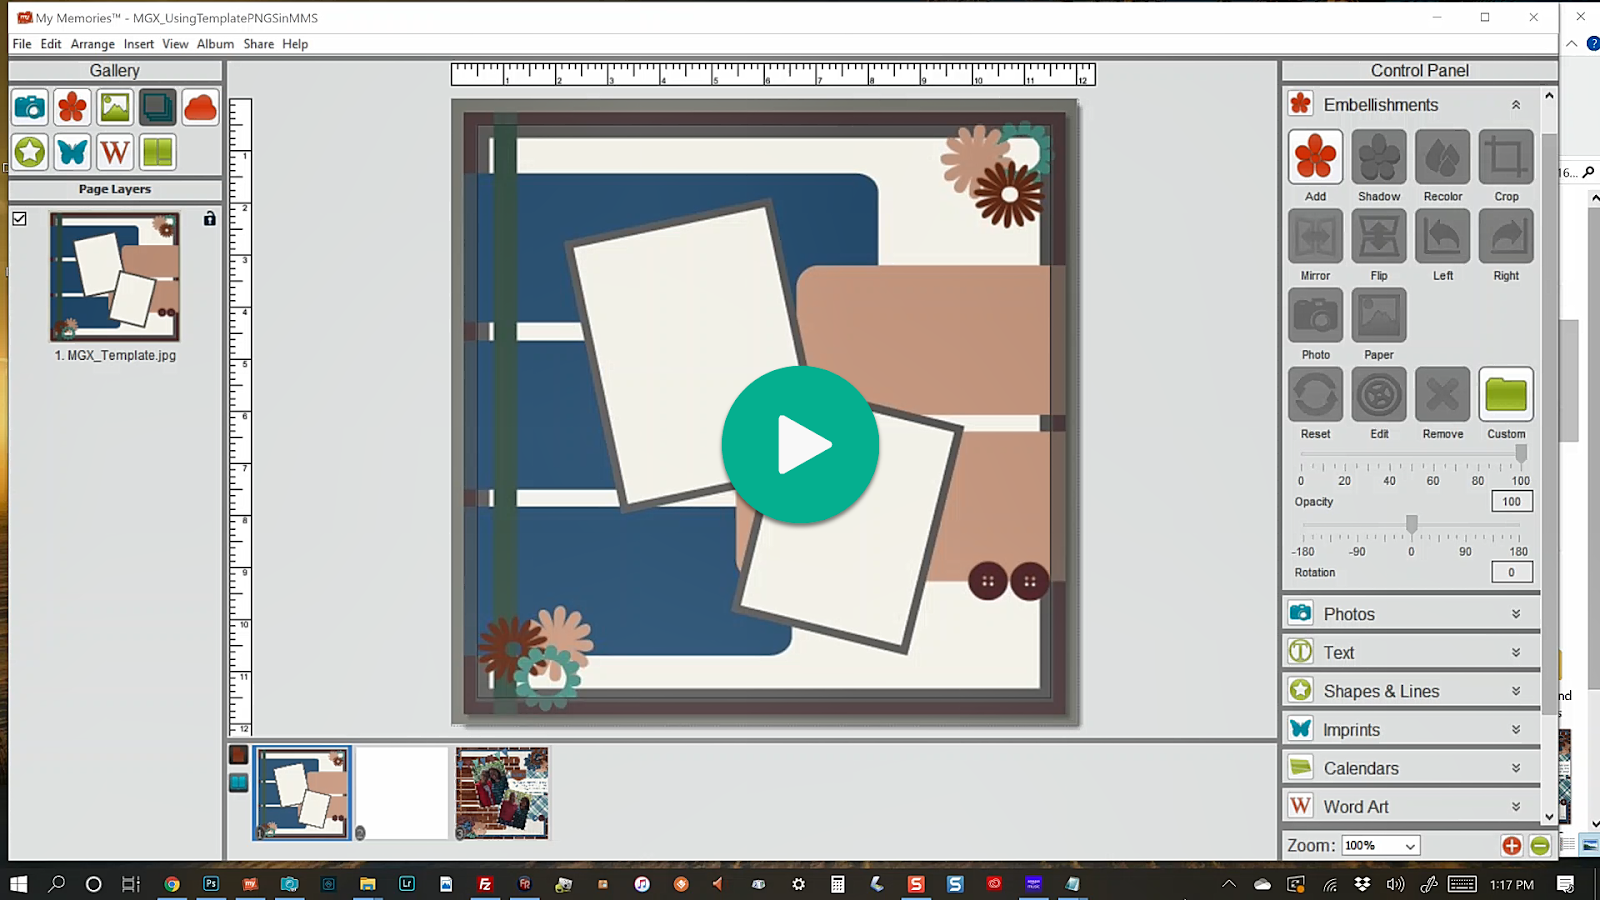
MYMEMORIES SUITE - I used this program for about 9 years before switching to Artisan. It's easy, it comes with a few kits to install, and you can import any other kits for freebies you find (as long as they are in JPG form for papers and PNG for embellishments). It has an affordable price of $39.99, and is a one-time purchase (not a subscription) - although they come out with new versions about every other year, and upgrades are an additional cost. I used to have a coupon code that would save you $10 off your purchase (I used to design for them). I don't know if it still works, but you can give it a try: STMMMS90118. MyMemories does have the option to print photobooks, individual scrapbook pages, and calendars through them, but that is all they offer in terms of a store. There are over 100 designers at the store - which makes it challenging to weed through their scrap kits for the best quality options. Not all kits are created equal!! MyMemories Suite is supported on both WIN and MAC - you just choose the download option that fits your computer. They also have a FB group where you could ask questions and share layouts.
PROS: Price for Software, runs on Windows & Mac, Easy to learn, kits purchased here can be installed into the software OR used in other scrapbooking programs.
CONS: Limited features (vs. Artisan), store is overrun with designers of varying quality - You really have to be discerning about what you buy. If you chose this option, you CANNOT use any of the digital kits I create.
STEP 2 - PHOTOS

I'm assuming that you have many photos saved on your computer. Any of those can be scrapped digitally. I recommend starting with a specific event or vacation because those have finite starting and ending points. Vacations are the easiest. You usually have many, many photos, and you can always find a kit to match and use items from that kit again and again for your layouts. I organize my photos into folders by YEAR → MONTH → EVENT.
STEP 3 - KITS
Cost, Where to Buy, Freebies, Organizing
I save all of my digital scrapbooking kits to an external hard drive - sorted by THEME --> DESIGNER INITIALS --> KIT NAME. Items purchased at Forever are downloaded in .pakit format; I leave the .pakit names as-is. I save these to my C:Drive and back them up to my externals. I have a 2nd (and 3rd!) external hard drive that I use as back-up! (Once you go digital, you definitely need to back-up EVERYTHING you buy!).
Packit files can just be saved in one folder. Within Forever, you can always go in to each collection ang "tag" files (sort them) by theme, genre, or any specifications you want. If you shop other stores, you are going to want to ORGANIZE your stash. I originally made this video for MyMemories, but if you skip to the 2-minute mark, you can see how I organize my items.
As far as QUALITY, you have to be discerning. As with anywhere, quality can GREATLY be different. Look at the preview and READ the description to see what is included with that pack. Look for quality stores with quality designers. It took me 3 YEARS to get a position at Forever; they are VERY discerning of who they hire, and they make sure that they hire only designers with top-notch quality of work. MyMemories has over 100 designers; that makes it hard to check quality - so take advantage of their large catalog of freebies to decide which designer's content fits your style and is made well.
It will be tempting to download EVERY FREE thing you find once you start with digital. That's okay - but you'll save some sanity if you only download things you think you will use. Again... Be discerning! Not everything you find for free is of good quality or in the style that you’d traditionally scrap.
Most quality kits are priced at $5.99-$9.99 depending on what and how much is included in a kit. Bundles are more as they contain more elements and papers. Experienced designers may have higher prices, and believe me, it’s worth it! Every item you purchase should have the following qualities:
of stores to see if a designer’s quality is good before you buy.
- Be 100% CLEAR and IN FOCUS - NO blurry parts!
- No “Stray pixels” - pixels floating around the outside of the image. The only exceptions are grunge/hodge podge - because they are supposed to look grungy and masks - which have edges that blend into the background.
- No Missing Pixels - you should not have “holes” in the items you buy!
- No Jaggedy Edges - if the item you’ve downloaded looks like it was cut out by a kindergartner with dull scissors, it’s going to look that way on your page!
of stores to see if a designer’s quality is good before you buy.
STEP 4 - PRINTING/PUBLISHING

You will want your individual layouts printed - if they are 12"x12", then you either need a large-format printer (I have the Epson Photo 1400), or you need to get them printed online. Costco will make 12" prints. Persnickety Prints has a great reputation. Before I had my own printer, I used ScrapbooksPlease. If you choose to scrap in a smaller format (8"x8" or 8.5"x11", then you can print yourself. Just choose GOOD quality paper/matte photo paper that is from the same manufacturer as your printer. (Printer ink is specially calibrated to work with the same brand paper - so it is important that you use the same brand of paper as your printer!).
There are also tips and tricks with printing. For example, the 12”x12” Scrapbook paper by Epson is $2.00/sheet. BUT, if I buy the 13”x19” Premium Presentation Paper Matte and cut it down to 12”x12”, I’ll only spend 40¢/sheet! This paper is thinner than their Scrapbook Paper, but since I either slide my printed layouts into portrait sleeves/page protectors or frame them, the thickness doesn’t matter!
You can also upload all of your layouts and have them printed as a book. I've done that with vacation pics and my school book. Forever has AMAZING print products - and, unlike other online sites, they do not sell your information or use your photos.
OTHER THINGS TO CONSIDER
BACKING UP Your Kits and Photos
📌When you work with digital, you MUST backup your photos and layouts! Systems crash, and the last thing you want is to lose all of your photos and the kits you’ve purchased. This is what I use - obviously, adjust to what works for you.
- I have a 5TB Western Digital Passport External Hard Drive (EHD). This holds all of the digiscrap kits I create or buy. It also holds every digital photo I’ve taken since 2001.
- My main 5TB EHD is backed up NIGHTLY to a second 5TB WD EHD. I use the program BACKUP4ALL. It allows you to create multiple backup instructions easily.
- ALL EHD’s have about a 3-year shelf-life. I ONLY use Western Digital because they have been the most reliable for me. Once an EHD starts to act twitchy - I replace it and use that old one as an additional backup.
- I also have a 12TB Western Digital Notebook-style EHD. This needs an additional power source and also plugs into my laptop when my laptop is in my office. This 12TB EHD is a secondary backup to the Main EHD. It also backups up all of my iTunes library, music, and videos.
- On top of all of that, I also pay yearly for Backblaze Cloud storage. I want to make sure that a copy of all of my kits, photos, music, and videos are stored safely offsite. Backblaze runs in the background continuously - but I’ve found that due to the quantity of stuff I have, it’s usually about 4 days behind in being up-to-date
- For your photos (not kits), look into the Forever Storage options. You can buy space in smaller amounts when they have sales and upload all of your photos and layouts there. Once you've purchased your space, you own it... FOREVER. Anything you upload is saved for your lifetime PLUS 100 years AND your account can be transferred to someone else (that you designate) after you die.
A HUGE COMMUNITY of DIGISCRAPPERS!
Facebook has hundreds of digital and paper scrapbooking groups. I LOVE checking out what my paper-scrapping friends are doing because their layouts give me inspiration for my digital layouts. Many digital designers also have their own groups for their fans - and freebies can be found there! Here are some of my favorite spots:
- Magsgraphics Gallery Showcase - (This is my group! Come scrap with me!)
- pixels2Pages Community Group - Layouts, Chat, Tutorials, Sales, and more!
- Fans of Forever Artisan - Layouts, Chatting, Sale information!
- MyMemories Fan Group - New Releases plus tips and tricks!
- Scrapbooking Layouts and Chit-Chat - Lots of inspiration here!
- Digi Scrapping Freebies - ALL FREE digital scrapbooking stuff!
Now it’s time for YOU to get scrapping! Please follow my BLOG and subscribe to my NEWSLETTER for my latest kits and sales. Feel free to reach out with questions; I’m happy to help!
 Maggie Buckley, MagsGraphics
 Maggie Buckley, MagsGraphics